Sunday, June 30, 2013

Salmon lasagne

Growing up in the arctic part of Norway, I was blessed having endless access to the most gourmet fish, freshly caught from the local ocean, lake or river by my Dad. Fish was cheap, easily available and typically a fish-dish found its way to our dinner table three times per week. Since moving to Australia, I must admit that my fish-consumption has gone down the drain. One reason is that fish doesn't quite taste the same as when it's caught and prepared by my Dad. Even salmon, which I used to love, doesn't smell "quite right" and has a strange after-taste when bought in my local, suburban-Brisbane Woollies. Therefore I am so happy to have found this recipe! Thank you thank you thank you to the lovely Linn from "Sprudlende sunn blogg"who posted it on her blog some weeks ago. The secret with this recipe is that it camouflages the salmon-odor between layers of delicious spinach-sauce, bechamel-sauce and garlic. What I'm talking about is salmon lasagne. Preparing this dish once per week will make sure I up my fish-intake considerable. Well, enough blabbing, here it goes:

Fish-base
500 g  salmon fillets 

Bake the salmon fillets with some salt and pepper on 200 degrees C for around 15 minutes. Continue with the other steps while the salmon is in the oven.


Spinach-sauce:
(It's not really a sauce, but I lack a better word)

500 g frozen spinach
3 tablespoons butter
1 finely chopped red onion 
2 stems of chopped spring onion 
A pinch of salt

Mix ingredients in a pot and let simmer for a few minutes 

Lasagna-plates 

Bechamel-sauce
2 heaped tablespoons butter
3 tablespoons flour 
500 ml full cream milk 
120 g shredded cheese 
2 gloves of garlic 
Salt and pepper

Melt the butter in a pot, stir in flour and add the milk little by little. When thickened, add the garlic and the cheese. 

Now is the time to admit I did something very very naughty: I used white flour....(the shock! The horror!) But I reckoned it was a  very small amount, and when I calculated the nutritional values (see below) it wasn't too bad. However,  I'd be happy to receive some tips on what can be used in stead to get that silky, bechamel-feeling.  

Combining the layers: 
Mash the baked salmon with a fork. Place about half of the salmon in a buttered oven-safe dish. 
Place a layer of the spinach-sauce on top of the fish. 
On top of that, spread about  half of the lasagne-plates. 
Cover with a layer of  the bechamel-sauce. 
Add another layer: Salmon, then spinach, then bechamel sauce and lasagne-plates.
Cover with more shredded cheese (I ended up using 90 grams). Put it into the oven and bake on 200 degrees C for around 15 minutes. Let the lasagne rest for 5 minutes before you enjoy this little piece of heaven. 


The recipe is a little bit cumbersome, but so worth spending some extra time on, as it gave the two of us dinner for 3 days (a total of six servings)The approximate nutritional values per serving is as following: 
  • kcal: 430
  • Carbs: 7 g
  • Protein: 31 g
  • Fat: 31 g
(Not bad, considering that some of the evil, white stuff found it's way into the dish)

I have amended the recipe slightly from Linn's original. 
Note to myself: Next time I make it, I'll try with a bit more fish, perhaps around 750 grams. 

Tuesday, April 9, 2013

Super-quick chicken casserole

I can't believe it's been nearly three months since the last time I posted a recipe on the blog. One reason is that I've transitioned from the (relatively) laidback student-life to working 8.30-5 with an additional two hours of commuting each day... I'm not the most creative in the kitchen at the best of times, and when I get home at six-ish now, the last thing I want to do is slave away over the pans for another hour. The man in the house is an okay cook, but his  repertoire of things low carb is fairly limited, so his recipes tend to run on repeat. Also, he has the same crazy schedule as myself, so to have him cook each and every day isn't fair to him either. Therefore, there has been a few too many take-away dinners lately, and I have been resorting to junk-food such as the low-carb pizza from Domino's, which actually isn't very low-carb at all... Can anyone guess in which direction my weight has started to move?

 Out of desperation I googled something like "super easy low-carb dinners" (but in Norwegian), hoping to get some tips on what on earth I could cook that is both LCHF and doesn't require me to spend an eternity in the kitchen on those nights I have a flat battery. The saying goes "When the student is ready the teacher will appear", and that's exactly what happened! I stumbled across the brilliant blog http://www.lavkarbogjortenkelt.net/, which is packed with exactly the kind of quick, no-fuss LCHF recipes I was looking for. A couple of hours of intense studying later I blissfully emerged, armed with twenty or so dinner-ideas which will make my life so much easier in the weeks and months to come. Thanks to the blog mentioned, I've regained the inspiration that I needed to go on eating LCHF in these busy times. Being time-poor is something I believe most Aussies can relate to, and following a way of eating that requires you to cook most things from scratch can further add to the stress. Therefore I will share these quick dinner ideas as I go along, experimenting with new recipes.

This dinner I'm going to share now was an instant success. It also took less than 20 minutes to make.  It's so easy that I can't believe I haven't thought about it before:

Ingredients
1 barbecued chicken (I got mine at Woolies)
1 red capsicum
Almost one whole leek 
1 cup pouring cream
Spices

Procedure
Chop capsicum and leek and lightly fry  in some butter in a wok. Cut the chicken into cubes and throw them in  with the vegetables. Add a splash of cream and some spice and let simmer until the cream has thickened a bit. Voila!  

This fed me and my better half and left one of us with lunch for tomorrow. Next time I will double the recipe as I love the feeling of coming home, realising that dinner will sort itself out after a couple of minutes in the microwave oven. 

Here are some photos. Unfortunately a bit blurry, as they are taken with my mobile. 


The spice you can see in the photo is about half a container (10 grams) of the "Masterfood Perfect for chicken herb and spice mix". with paprika, onion and garlic. It's full of sugar and surely other nasty stuff, but an easy option when you are unsure of exactly what spices will go nicely together. Any suggestions to what spices I can try next time instead of this? 

Saturday, January 12, 2013

Australia Day cake

I found this recipe on www.ingridsblogg.no a while ago, and I have been drooling over it ever since. When celebrating Christmas with my partner's family, I was in charge of desserts. So I thought I'd seize the opportunity and finally make this cake. And it really lived up to my expectations! I thought I'd share it with the heading "Australia Day cake", since this holiday is coming up soon, and you may be looking for a low carb treat. It's super easy to make, calls for no mysterious ingredients, and it's been approved by my low-carb-sceptic extended family! 


Ingredients:
100 g almonds
75 g butter
150 ml erythritol
300 ml cream
300 g Philadelphia cream cheese

1 teaspoon vanilla powder
3 teaspoons cocoa
100 g 70% chocolate


Method:
Melt butter and grind the almonds. Mix almonds, 3/4 of the melted butter and 50 ml erythritol. This is the crust of the cake. Spread the mixture into a spring-form and place in the refrigerator to set. 

Then, whip the cream together with 50 ml erythritol. In another bowl, whip the cream cheese and the last 50 ml of erythritol. Combine the two mixtures and stir. 

Divide the batter into two bowls. In one bowl, add in the cocoa, while in another you add in the vanilla powder. (Now you've got one bowl of chocolate-cream and another with vanilla-cream)

Spread the chocolate-cream on top of the almond-base. Add the vanilla-cream layer on top of that. Put the cake back in the fridge while you prepare a final layer of melted chocolate:

Melt the chocolate together with the remainder of the butter. Let the chocolate cool a little, then spread it on top of the cake. Let stand to cool for a couple of hours before serving. 

Enjoy!

Here are some photos. Unfortunately, some of them turned out a bit blurry


Loving earth vanilla powder

Happy New Year, everyone!

I'd like to start the new year with  a recommendation for a brilliant product!
You may have noticed that several of my recipes call for something called vanilla powder. It is exactly what it sounds like: Pure, ground vanilla. Until now I have been unable to find it anywhere in Australia. I have probably asked about it in ten health food stores, and they have just looked at me weirdly. Iherb doesn't stock it either. I found it on a UK website called gojiking, but somehow I never got around to order it. I had just resigned myself to always having to bake with that icky, sugary-laden vanilla-paste from my local Woollies. I once found a vanilla essence that was just vanilla and alcohol (no sugar), but I wasn't too impressed. Of course, I could just use vanilla-pods, but firstly I'm too lazy to scrape out the seeds, and secondly, they cost a fortune in Australia. But, one morning I saw this Aussie supermodel on a TV-show sharing a cake-recipe where she used ground vanilla. She said it was from loving earth, which I found out was an internet store after some googling. VOILA! I ordered it, and a couple of days later I had the parcel at my door step.

This is how it looks like:


Now, it wasn't cheap: This 75 gram container was around 20 dollars (if I remember correctly). But, you only ever use a teaspoon, so it will last forever! What I like about baking with real, ground vanilla, is that you get these little black vanilla grains that makes your ice-cream etc look really gourmet-ish. Plus it tastes yum, and that it's organic doesn't hurt! Use in teas, coffees, smoothies - and of course all your low-carb treats.

I can not recommend this product highly enough for your low carb baking. 

Monday, September 10, 2012

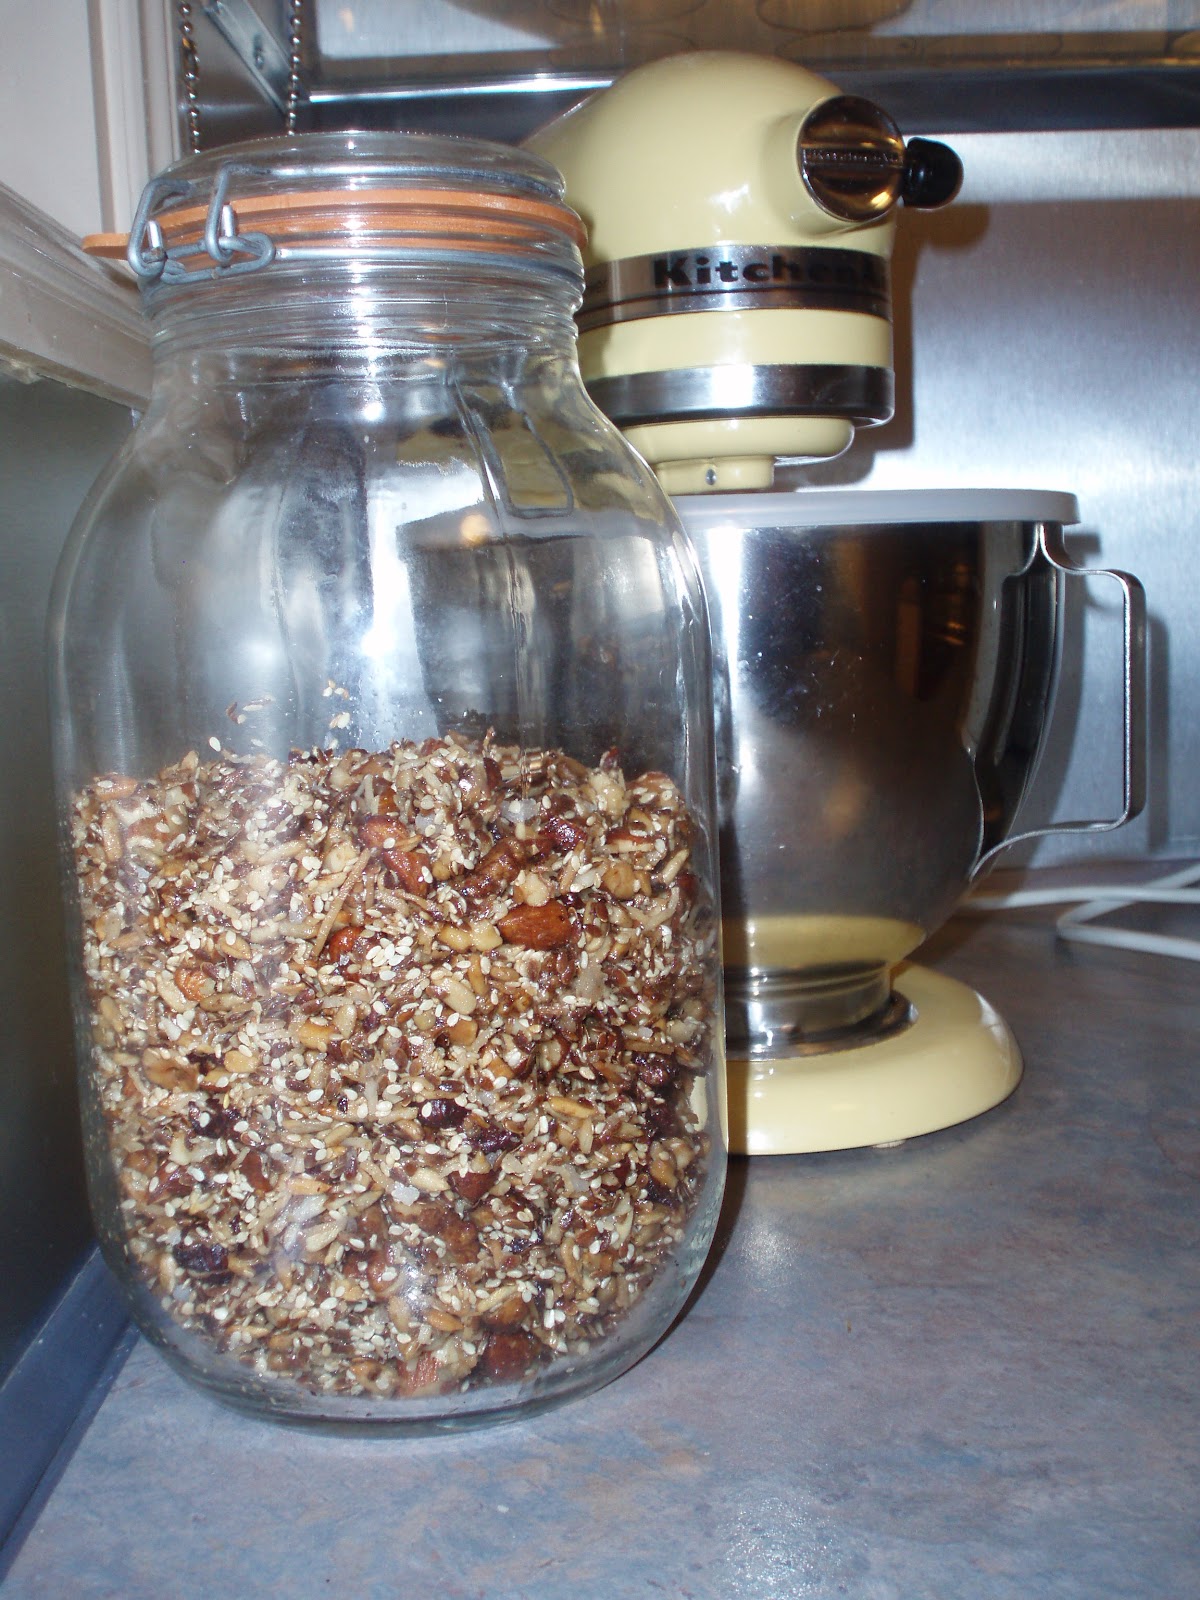
Toasted müsli, LCHF style


I am SO glad I found this recipe, as well as finally finding he time to make it! Because this is the best müsli I have ever eaten.  It’s so healthy as well, without any of that nasty sugar the store-bought toasted müslis are full of.  And of course, it’s low in carbs as well. 


Ingredients
1 cup almonds
1 cup walnuts
1 cup hazelnuts
1 cup sunflower seeds
1 cup linseeds, whole
1 cup sesame seeds
1 cup shredded coconut
1 cup water
½ cup coconut oil
5 tablespoons erythritol (or other sweetener), plus more erythritol for tossing
Cardamom
1 teaspoon salt

Method
Preheat oven to 180 degrees Celsius. Roughly chop walnuts, hazelnuts and almonds and transfer to a large baking bowl.  Add seeds and the shredded coconut, stir.  Then add salt and sweetener. Pour over oil and water and stir well. Spread mixture on a baking tray, there’s no need to use baking-paper underneath.  Sprinkle more erythritol on top, along with some cardamom (if desired). Put the tray in the oven, without stirring at this point in time. Bake for 15 minutes in the middle of the oven. Then remove tray, stir thoroughly to prevent burning. Add another layer of erythritol, then bake for another 15 minutes before stirring again. Repeat process every fifteen minutes, with or without adding cardamom. I think I got 4 layers with sweetener, and chose to add cardamom on two of those layers. The baking-time was roughly 1 hour to make a crispy, golden müsli. Depending on your type of oven, it may take a bit more or less. I reduced the temperature down to 160 degrees C towards the end.  Guess what I’ll be having for breakfast tomorrow –  and probably for the rest of the week  :-D

Enjoy! 


Thanks to Caroline on www.fotballfrue.no for inspiration. I have made a couple of small changes, and "australianised" the recipe somewhat using cup-measures. 

Saturday, September 8, 2012

LCHF picnic

Spring is here in the Southern Hemisphere!!! I love to head for the beaches this time of year, and pack lots of goodies for a picnic. Living in the Brisbane-area I'm so lucky to have all the wonderful beaches in Sunshine Coast and Gold Coast within day trip-distance, so I'm planning for lots of nice picnics this season :-D

Here are some tips for what to pack for a LCHF picnic:

- Different cheeses
- Olives
- Cherry tomatoes
- Cauliflower
- Celery
- Carrots (depending on your "carb-budget)
- Strawberries
- Salami
- Ham
- Chicken-wings
- Dips (make your owns, or choose some that are low in sugar)
- LCHF almond sesame crackers, see the recipe below


My friend who doesn't eat LCHF had brought some fruit as well (in case you were wondering what the bananas are doing in a post about low carb picnic-suggestions)

Almond sesame crackers

These crackers have become a favourite of mine. They are perfect for breakfast, and also work nicely with a cheese-platter and some wine. I’ve been having them for breakfast quite frequently the last couple of months. Three of these with some brie and butter on, and I’m full until way past lunch-time.  I found the recipe at Linn’s blog, www.linn-sin-verden.blogspot.com.

Ingredients
250 ml ground almonds (or if you ground your own, use about 200 ml of whole almonds)
100 ml sesame seeds
2 eggwhites
½ teaspoon salt
1 teaspoon sweetener, I use erythritol
2 teaspoons psyllium husk fibre

Procedure
Heat oven to 180 degrees C.
Combine all ingredients in your mixer and mix for half a minute or so.  Then form round balls which you then squeeze flat on a baking paper.  Moisten your hands with water beforehand;  it makes it easier to form the crackers.  This recipe gives me 8-9 “breakfast-sized” crackers, but if you are making these to have with wine and nibblies, they can be made smaller as well. They also taste nicely with some sea-salt tossed on top right before they go in the oven.  Bake for 20 – 25 minutes depending on size.
Enjoy! 


This is how my breakfast looked like one morning. I had actually been a bit  too optimistic with the amounts of food on my plate, I couldn't finish it all...